Motivation
When writing a tutorial, you often need to write the same logic in multiple different languages based on the user preference. You can most commonly see this in the front-end community, with the rise of TypeScript and the various config file specifications.
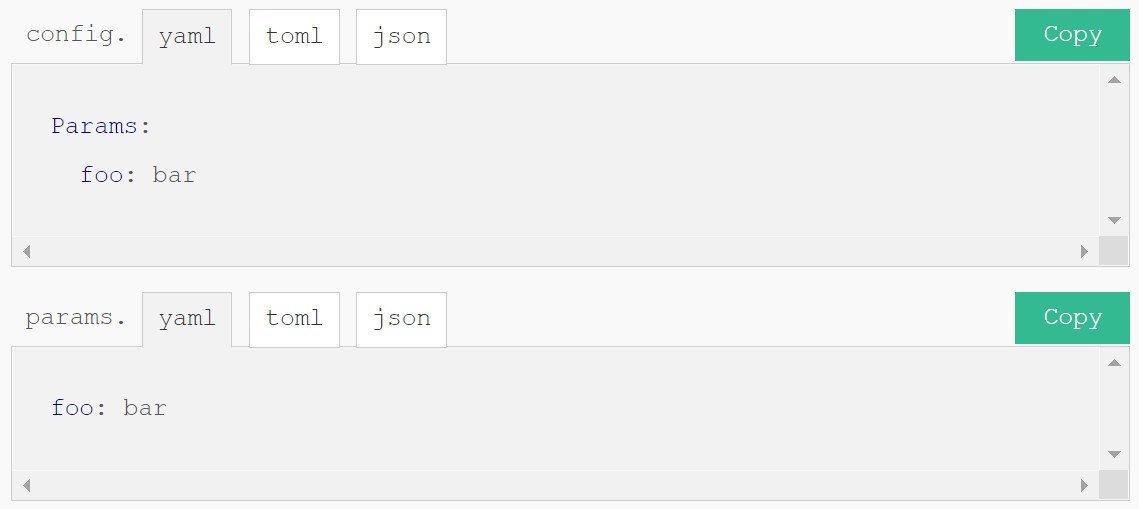
Below is an example of how Hugo documentation deals with this.

If we have a closer look at the raw Markdown and the shortcode, the shortcode takes the code in one of the three languages and automatically convert it to the others. It is super cool and I might be able to use Hugo Pipes to develop similar features with TypeScript–JavaScript conversion, but it feels like an overkill to me and I am not very bothered with manually typing the different versions.
This post provides you a simple approach to generate tabbed views in Hugo with shortcodes and simple JavaScript. Note that the source code for this shortcode is heavily influenced by the Learn Theme for Hugo. You can view their source code here.
Aim
We would like to make a switchable tabs that look like below. You can click the tabs to switch between different languages.
def hello(name):
    print(f"hello, {name}!")
def hello(name):
print("hello, {name}!".format(name=name))function hello(name) {
console.log(`Hello, ${name}!`);
}function hello(name: string): void {
console.log(`Hello, ${name}!`);
}Below is the markdown required to render the tabs.
{{% tabs id="preview" %}}
{{% tab name="Python 3.6+" %}}
```python
def hello(name):
print(f"hello, {name}!")
```
{{% /tab %}}
{{% tab name="Python 3" %}}
```python
def hello(name):
    print("hello, {name}!".format(name=name))
```
{{% /tab %}}
{{% tab name="JavaScript" %}}
```javascript
function hello(name) {
    console.log(`Hello, ${name}!`);
}
```
{{% /tab %}}
{{% tab name="TypeScript" %}}
```typescript
function hello(name: string): void {
    console.log(`Hello, ${name}!`);
}
```
{{% /tab %}}
{{% /tabs %}}summary The child shortcodes append its title and content to the .Scratch of the parent shortcode. The parent then renders the HTML and provides the necessary JavaScript script to control the tabs.
Storing content
Let’s have a look at the children first. They do not need to render anything, but to store the name of the tab and its content inside parent’s .Scratch space.
| |
Note You may wonder that why the children has to call .Parent.Scratch.Set, where the following structure looks much more reasonable:
<!-- parent shortcode -->
{{ .Scratch.Set "tabs" slice }}
{{ with .Inner }}
  {{/*  ...  */}}
{{ end }}
<!-- child shortcode -->
{{ .Parent.Scratch.Add "tabs" ... }}The issue is that Hugo renders the child shortcodes before rendering their parent and the code above will fail with the following error.
"layouts\shortcodes\tab.html:2:4": execute of template failed at <.Parent.Scratch.Add>:
error calling Add: can’t apply the operator to the values
It is definitely a counterintuitive pattern!
Rendering
Now, the parent can range over the content and construct the HTML.
| |
Below shows how the shortcodes are rendered.
{{% tabs %}}
{{% tab name="Tab 1" %}}
Content 1
{{% /tab %}}
{{% tab name="Tab 2" %}}
Content 2
{{% /tab %}}
{{% tab name="Tab 3" %}}
Content 3
{{% /tab %}}
{{% /tabs %}}<div class="tab-container">
<div class="tab-header">
<button class='tab-button active'>Tab 1</button>
<button class='tab-button'>Tab 2</button>
<button class='tab-button'>Tab 3</button>
</div>
<div class="tab-content">
<div class='tab-item active'>Content 1</div>
<div class='tab-item'>Content 2</div>
<div class='tab-item'>Content 3</div>
</div>
</div>We can also add some CSS to only show the contents of the active tab.
| |
Tab-switching logic
Now it’s time to add some JavaScript to control the tabs. There are many possible methods, and you can even achieve the same result with pure CSS, but I find HTML data attributes are the most elegant way.
We first add two data attributes to the tab items and buttons, data-tab-item and data-tab-group. data-tab-item stores the name of each tab, and data-tab-group works as a duplicatable element ID to allow multiple tab environments to have the same ID.
| |
Then, we can add the following onclick event listener that finds all tab items and buttons and toggles the .active CSS class:
function switchTab(groupId, name) {
  const tabItems = document.querySelectorAll(
    `.tab-item[data-tab-group="${groupId}"]`
  );
  const tabButtons = document.querySelectorAll(
    `.tab-button[data-tab-group="${groupId}"]`
  );
  [...tabItems, ...tabButtons].forEach(
    (item) => {
      if (item.dataset.tabItem === name) {
        item.classList.add("active");
      } else {
        item.classList.remove("active");
      }
    }
  );
}
Update It is somewhat annoying to set unique ids for each tab groups, so you can also generate a random string on the fly:
{{/*  ...  */}}
{{- $groupId := now.UnixMicro | sha256 | trunc 6 -}}
{{- with .Get "id" -}}
  {{- $groupid = . -}}
{{- end -}}
{{/*  ...  */}}
Source Code
Finally, below is the full source code for your reference.
{{/* script */}}
{{- if not (.Page.Scratch.Get "no-tab-script") -}}
  {{ $js := resources.Get "js/tabs.js" }}
  <script src="{{ $js.RelPermalink }}"></script>
{{- end -}}
{{/* HTML */}}
{{- with .Inner }}{{ end -}}
{{- $groupId := .Get "id" | default "default" -}}
<div class="tab-container box">
  <div class="tab-header">
  {{- range $idx, $tab := .Scratch.Get "tabs" -}}
    <button
      data-tab-item="{{ .name }}"
      data-tab-group="{{ $groupId }}"
      class='tab-button {{ cond (eq $idx 0) "active" "" }}'
      onclick="switchTab('{{ $groupId }}','{{ .name }}')"
    >{{ .name }}</button>
  {{- end -}}
  </div>
  <div class="tab-content">
  {{- range $idx, $tab := .Scratch.Get "tabs" -}}
    <div
      data-tab-item="{{ .name }}"
      data-tab-group="{{ $groupId }}"
      class='tab-item {{ cond (eq $idx 0) "active" "" }}'>
      {{ .content }}
    </div>
  {{- end -}}
  </div>
</div>
{{ if .Parent }}
{{ $name := trim (.Get "name") " " }}
{{ if not (.Parent.Scratch.Get "tabs") }}
{{ .Parent.Scratch.Set "tabs" slice }}
{{ end }}
{{ with .Inner }}
{{ $.Parent.Scratch.Add "tabs" (dict "name" $name "content" .) }}
{{ end }}
{{ end }}function toggleActive(element, condition) {
if (condition) {
element.classList.add("active");
} else {
element.classList.remove("active");
}
};
function switchTab(groupId, name) {
const tabItems = document.querySelectorAll(
`.tab-item[data-tab-group=${groupId}]`
);
const tabButtons = document.querySelectorAll(
`.tab-button[data-tab-group=${groupId}]`
);
[...tabItems, ...tabButtons].forEach(
(item) => toggleActive(item, item.dataset.tabItem === name)
);
};